


Building a website that looks exactly like your design can feel challenging, especially when you start with a Figma file and need to create a website on WordPress. Thankfully, with the Avada Builder, the process becomes much smoother.
This guide walks you through how to convert a Figma design into a fully functional WordPress website using Avada Builder. You’ll learn how to prepare Figma files, set up WordPress, customize layouts, and ensure everything looks perfect across devices.
Figma and WordPress: A Brief Overview
Before diving into the process, it helps to understand what Figma and WordPress are and how they work together.
Figma is a powerful design tool used by designers to create beautiful web layouts, prototypes, and UI components. It’s entirely web-based and allows easy collaboration among team members.
WordPress, on the other hand, is a popular content management system (CMS) that powers millions of websites. It allows you to build, manage, and customize websites with ease using themes, plugins, and builders like Avada Builder.
When you convert Figma to WordPress, you’re essentially translating your visual design into a real, working website. This conversion ensures your site looks exactly like your design while functioning smoothly on the backend.
How a Professional WordPress Developer Can Help?
While Avada Builder simplifies the Figma to WordPress conversion process, a professional WordPress developer can elevate your website to the next level.

Their technical expertise ensures your site is not only visually accurate but also secure, optimized, and scalable. Working with a developer brings added precision and flexibility that no builder alone can provide.
- Create Custom Themes and Plugins: A developer can build custom themes and plugins tailored to your specific needs. This allows for unique functionality and design beyond what standard tools offer.
- Improve Backend Performance and Security: Developers can enhance backend performance by optimizing code, databases, and server settings. They also implement advanced security measures to protect against threats and vulnerabilities.
- Optimize for SEO and Speed: Through clean coding, caching, and adherence to SEO best practices, developers ensure your site loads quickly and ranks higher in search engine results.
- Integrate Third-Party APIs and Advanced Features: For websites that require complex systems, such as payment gateways or CRM tools, developers can seamlessly integrate third-party APIs and dynamic content solutions to enhance functionality.
Ultimately, partnering with a skilled WordPress developer guarantees a high-performing, fully customized website that aligns perfectly with your business goals.
Transform Figma Designs Into a Dynamic WordPress Site
Whether you prefer a fully custom solution or want to leverage powerful page builders, we’re here to assist you every step of the way.
Comparing Website Builders Before You Start
Before starting your Figma to WordPress conversion, it’s essential to compare popular website builders.
Each builder has unique strengths, and understanding them helps you choose the one that best fits your design needs, workflow, and project goals. While Avada Builder is highly versatile, exploring other options gives you a clearer perspective.
| Website Builder | Strengths | Best For |
| Avada Builder | Deep theme integration, responsive control, advanced customization | Complex, design-heavy websites |
| Beaver Builder | Simple interface, reliable, stable | Beginners or straightforward sites |
| Divi Builder | Strong visual editing, design freedom | Creative professionals |
| Elementor | User-friendly, extensive widget library | Dynamic and fast page creation |
| Bricks Builder | Performance-focused, clean code, full design control | Developers who value speed |
| WPBakery | Drag-and-drop functionality, wide plugin compatibility | Multi-feature websites |
Preparing Your Figma Design for WordPress Conversion
The first step toward a successful Figma to WordPress conversion is preparing your design files properly. Clean and organized Figma files make the entire process faster and more accurate.
Here’s what you need to do:
- Organize Layers and Components: Ensure that every element in your Figma file, including text, buttons, icons, and images, is properly labeled and categorized. Group related components together. This organization helps you identify which elements belong where when rebuilding the layout in WordPress.
- Use a Design System: Figma allows you to create a design system that defines consistent typography, colors, and spacing. A design system ensures your WordPress site follows the same visual guidelines.
- Export Assets Properly: Export images, icons, and graphics in web-friendly formats like PNG, JPEG, or SVG. Also, optimize them to reduce file size, which will help maintain website performance.
- Plan for Responsiveness: Check how your design adapts across different screen sizes. Create desktop, tablet, and mobile versions of your layout in Figma so you can replicate this responsiveness later in WordPress.
- Document Key Styles and Interactions: Note down font sizes, color codes, hover states, and animations. This makes recreating them in Avada Builder much easier.
By completing these preparations, your design will be ready for smooth integration with WordPress.
Comparison: Elementor vs Figma
Setting Up WordPress for Figma Conversion
Now that your design is ready, it’s time to set up WordPress.
- Install WordPress: Start by installing WordPress on your hosting server. Most hosting providers offer one-click installation options.
- Choose a Reliable Theme: Although Avada Builder works with almost any theme, it performs best when paired with the Avada Theme itself. Install and activate it.
- Install and Activate Avada Builder: Once the theme is active, install the Avada Builder plugin. It’s a drag-and-drop page builder that helps you visually create pages without coding.
- Set Up Your Site’s Structure: Create basic pages like Home, About, Services, and Contact. This provides a framework for importing your design.
Once WordPress is ready, you can move on to converting your Figma design into real web pages.
Converting Figma to WordPress Using Avada Builder
With Avada Builder, you can easily translate your design into a responsive and dynamic WordPress site. Follow these steps carefully:
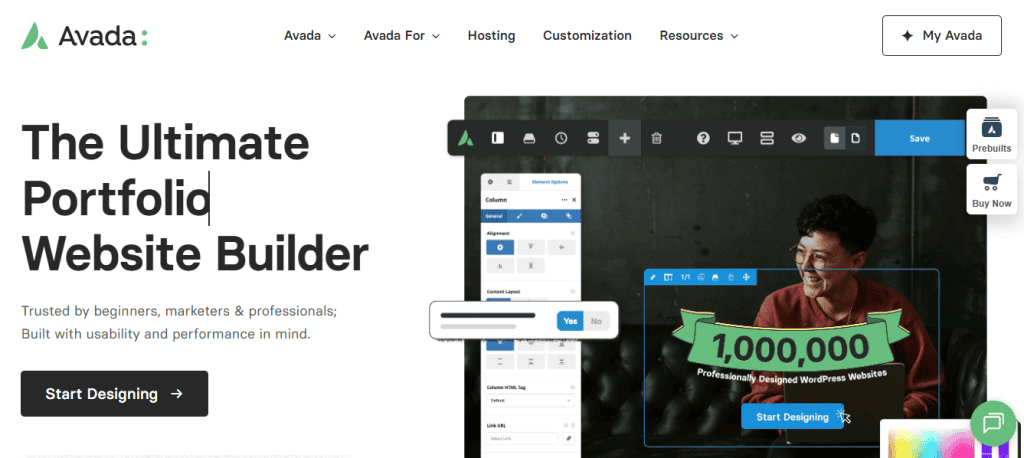
Step 1: Familiarize Yourself with Avada Builder
Spend some time exploring the Avada interface. You’ll see tools for adding rows, columns, and elements. The visual builder allows you to drag and drop items exactly where you want them, making it easy to replicate your Figma design.
Step 2: Set Up the Page Layout
Open a new page in WordPress and enable Avada Builder. Start by setting up the overall structure, which includes the headers, footers, and section layouts. Use Avada’s layout builder to define container widths, padding, and alignment to match your Figma design.
Step 3: Add Design Elements
Using the drag-and-drop interface, add text blocks, buttons, images, and icons as needed. Customize each element’s size, color, and typography according to your Figma style guide. You can also use Avada’s pre-built templates as a starting point. These templates can be easily adjusted to reflect your design layout.
Step 4: Import and Use Assets from Figma
Upload all your exported assets, such as images and icons, to the WordPress media library. Replace placeholder images in Avada with your actual design assets. If you have complex SVGs or animations, you can use third-party plugins to embed them properly.
Step 5: Apply Custom CSS for Finishing Touches
Some unique styles from your Figma file might not be achievable through Avada’s visual settings alone. In such cases, use custom CSS. Avada allows you to add CSS globally or to individual elements.
Step 6: Add Interactive Elements
Avada Builder includes built-in tools for buttons, forms, sliders, and animations. Use these features to recreate interactive elements from your Figma prototype.
Step 7: Configure Responsiveness
Next, test how your layout appears on different devices. Avada Builder has responsive editing tools that allow you to adjust padding, margins, and font sizes for mobile and tablet views.
Step 8: Test Your Page
Preview your page frequently. Compare it with your original Figma design and make minor adjustments until the layout and spacing match perfectly. Rest here’s a checklist:
- Cross-Browser Testing: Check your site in multiple browsers, Chrome, Firefox, Safari, and Edge, to ensure consistency.
- Device Responsiveness: View your site on different devices and screen sizes.
- Performance Optimization: Compress images, enable caching, and use performance plugins to boost loading speed.
- SEO Review: Add meta titles, descriptions, and alt tags. Make sure your URLs are clean and SEO-friendly.
Once everything works perfectly, it’s time to launch your site!
Check out: Pixel Perfect Design Best Practices
Maintaining Your WordPress Website
Launching your website is just the beginning; consistent maintenance ensures your site remains fast, secure, and fully functional. Regular updates and monitoring help prevent issues and improve overall performance.

- Update Regularly: Always keep WordPress, themes, and plugins up to date to protect your site from vulnerabilities and ensure smooth functionality.
- Back Up Your Site: Use a reliable backup tool like BlogVault to create regular copies of your website, so you can quickly recover data in case of an issue.
- Monitor Performance: Check your site’s loading speed frequently using tools like GTmetrix or Google PageSpeed Insights to maintain optimal performance.
- Optimize for SEO: Continuously refine your content, keywords, and metadata to improve search visibility and attract more visitors.
- Test Responsiveness: After major updates, test your website on different devices to confirm it displays and functions correctly.
Additional Tips to Customizing and Enhancing Your New WordPress Site
Avada Builder offers endless customization options to help you refine your website even further. You can:
- Use the theme options panel to control typography, color palettes, and header styles globally across your site.
- Create custom layouts to build unique templates for blog posts, portfolios, or product pages. Avada’s flexibility makes it easy to tailor layouts for different types of content.
- Add custom post types and plugins to extend your site’s functionality by adding plugins for contact forms, SEO, or eCommerce. For example, integrate WooCommerce if you’re building an online store.
- Leverage the WordPress Block Editor (Gutenberg) as Avada integrates seamlessly with it, allowing you to use both tools side-by-side.
Know more: Best White Label Web Design Companies for Agencies
Working with Avada’s Dynamic Content and Advanced Features
When your Figma design includes advanced or data-driven elements, Avada Builder makes it easy to bring them to life. These features help you create a site that not only looks great but also adapts intelligently to your content and users.
- Dynamic Content: With Avada Builder, you can display content dynamically, such as blog posts, testimonials, or product listings, ensuring your site always stays fresh and relevant.
- Conditional Logic: You can show or hide specific elements based on user actions or conditions, creating a more personalized browsing experience.
- Custom Fields: Add custom fields for unique data types, such as pricing, team bios, or detailed service information. This gives you complete control over your content.
- Theme Builder: Finally, use Avada’s Theme Builder to design custom headers, footers, and single-page templates. This ensures every part of your website matches your brand vision seamlessly.
Conclusion
Converting a Figma design to WordPress using Avada Builder is a straightforward process when approached methodically. By preparing your Figma files properly, setting up WordPress correctly, and using Avada’s drag-and-drop tools, you can build a pixel-perfect website that looks and performs exactly as intended.
Whether you’re a designer or a business owner turning mockups into a live site, Avada Builder gives you all the tools you need.
With its responsive design controls, customization options, and integration features, you can create a stunning, functional, and high-performing WordPress website all without touching a single line of code.
FAQs About WordPress and Figma
How do I convert Figma designs into WordPress?
You can convert Figma designs into a fully functional WordPress site by using a page builder or WordPress plugin that allows importing Figma design files directly.
Can I create a functional WordPress site without coding?
Yes, with professional builders and pre-made templates, you can build a functional WordPress site without extensive coding knowledge. However, some advanced features may require technical skills.
Are there templates available for WordPress projects?
WordPress offers professional templates and pre-made templates for blogs, landing pages, and business sites, making the design process faster and more visually appealing.
How do I ensure mobile responsiveness?
Most WordPress themes and builders provide tools to make WordPress pages responsive, ensuring your website looks great on mobile devices for all WordPress users.
Can I integrate Figma with WordPress?
Yes, you can integrate Figma into WordPress workflows using plugins or manual methods, which helps translate your Figma design files into a visually appealing website.
Are free versions of builders enough?
The free version of many builders allows basic site creation. But, using advanced tools and key features may require a premium plan, especially for complex WordPress projects.
Which sites can I build with WordPress?
You can build anything from a personal blog to landing pages and eCommerce stores. Some page builders have a steeper learning curve, but they offer all the key features necessary for a fully functional website.